I guess this will end up being whatever the person getting it wants it to be. I believe it could be used for any one of the choices, or all 3 depending on the whim.
It ended up being 16 X 21 1/2 inches which would qualify it as a mini quilt. I believe it will be very close to the right size for a doll cradle where it's going, and I could easily see it on a buffet or table.
This is the print that I used on the back. Again, it could be used for all the uses I've already mentioned.
I can see all the girls in our family in this print. My mom loves cardinals, one sis is a bird lover, another has snowman dishes, and I just love the trees. hmmm wish I had more of this fabric now!
This view shows the twister pinwheels a bit better - and the machine quilting I did on them.
I'm tickled with the way it turned out.
This is just where I'm logging my progress in my quilting projects. While I just started quilting in late 2007, I've been completely bitten by the bug and love learning new techniques, seeing new projects, and have seemed to have gotten really fond of acquiring stash!!
Visitors
Sunday, December 5, 2010
Monday, November 29, 2010
Scrappy Woven Bricks Quilt
inspired by: This blogger's post
Finished Size 55” X 74”
192 Nickels
1 yard neutral [or framing fabric]
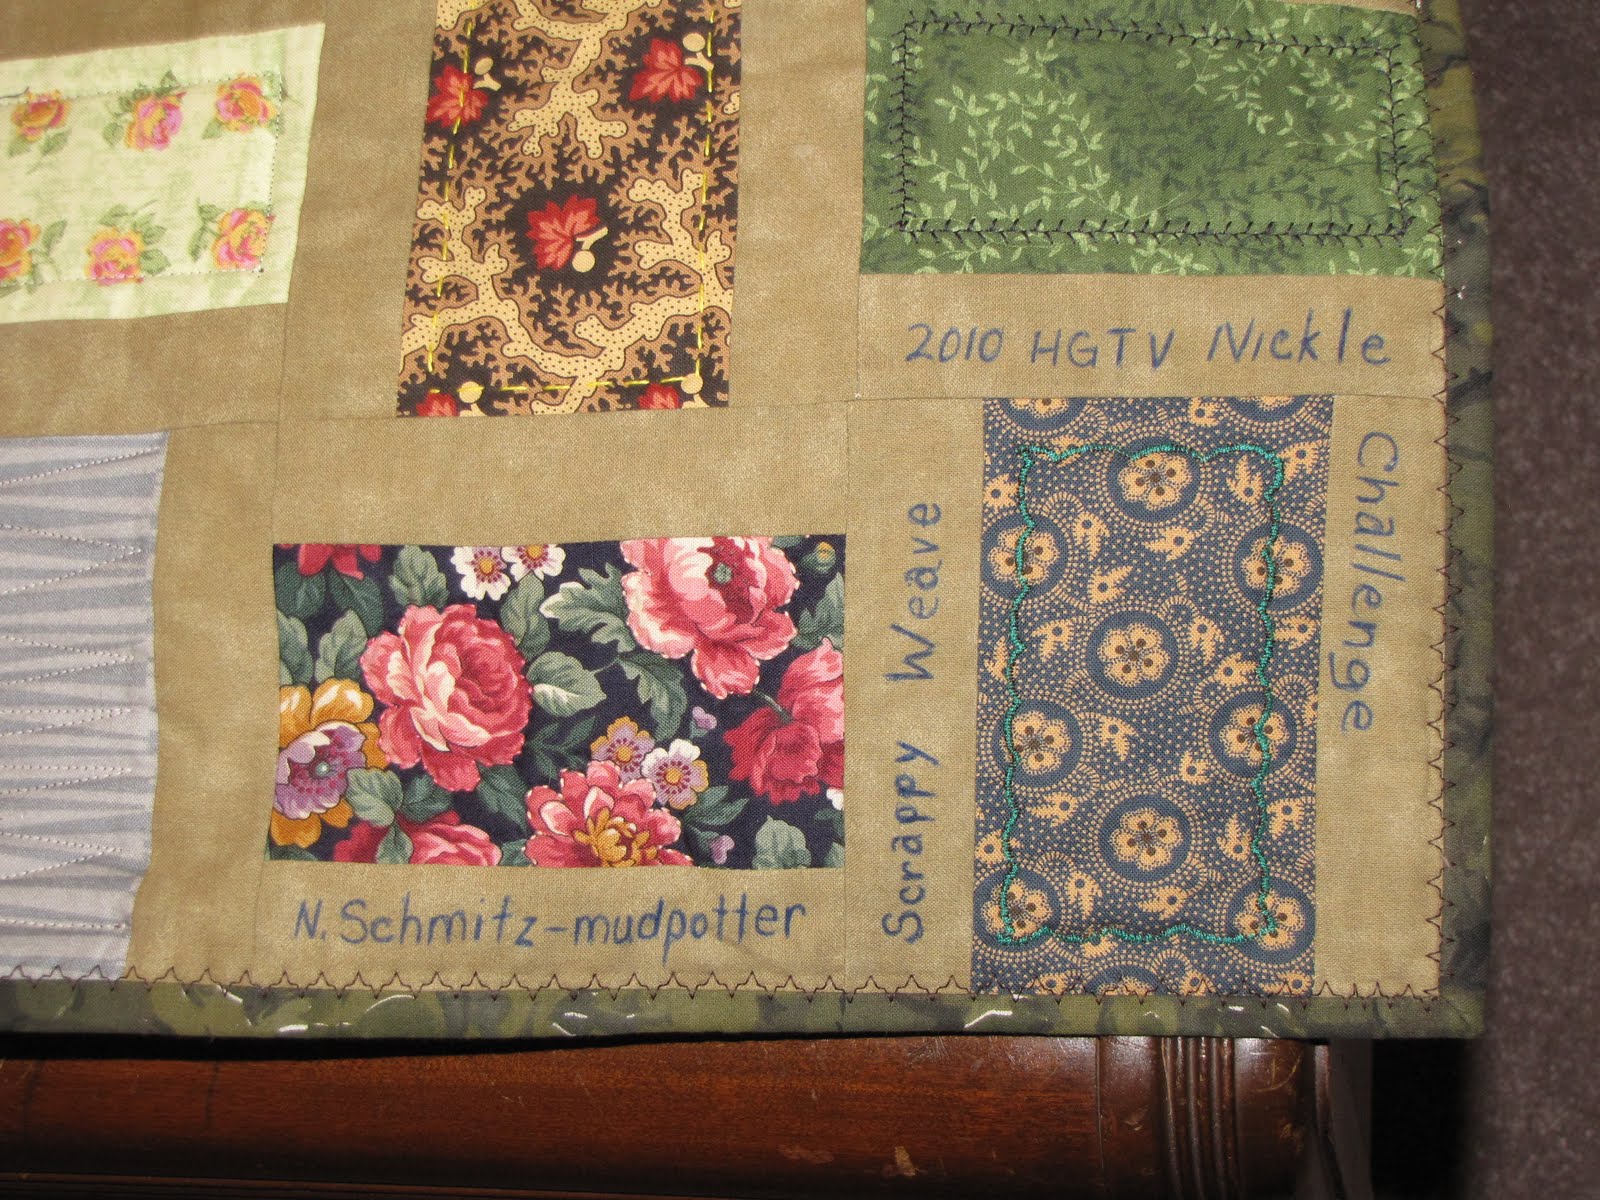
I did it - I finally finished this quilt which is the result of an HGTV quilting board challenge. I'd taken enough pictures along the way that I thought I'd do a simple tutorial to show you how I'd done the process and even some of the trouble I ran into along the way.
I started out with 5”X5” pieces of fabric (several were exchanged with other members of the group swap hosted by KC1930). Trim the nickels down to 3 ½ X 5.
Pick out your complimentary fabric – mine was the tan, and cut lots of 1 ¼ “ strips and attach to each 5” side of your trimmed pieces. Press toward the neutral fabric. Your new-framed piece should be back to the 5” square.

Start laying out your brick pattern in a 4 X 4 grid like the picture and sew up 12 of these blocks. They should measure out to 18” square when you are done. Make 12 of these.
Cut 12 pieces of batting and backing at 20” square, and make your quilt sandwiches. You will now have 12 easily portable pieces to work on when riding along in the car, waiting for appointments, or watching TV. I tried a bunch of different things with mine including machine stitches, big stitch with perle cotton, and even a little outline embroidery.
Putting it all together
Now it’s time to put it all together.
Start by folding and pinning back the backing fabric so you don’t cut into it.

Trim the excess batting away – being careful to NOT cut your backing.

Then trim your backing fabric to 1” larger than your block and batting.

Line up 2 of your large blocks together with backing fabric next to each other. Stitch these 2 blocks together – using your batting as your stitching line.

Press seams open, then fold down ½ of the seam and press it down. Using a decorative stitch, stitch this seam down on both sides.
Continue till you have paired all 12 blocks into 6 pairs.
Pair up each of these pairs with another pair and repeat the joining as you did above.

You should end up with 3 strips that are 4 blocks long.
Here you can see part of 2 of my 3 long strips.

Join your 3 strips in the same manner so you have quilt nearly completed with 3 blocks across and 4 down.
Square up your quilt, bind it - and your DONE
inspired by: This blogger's post
Finished Size 55” X 74”
192 Nickels
1 yard neutral [or framing fabric]
I did it - I finally finished this quilt which is the result of an HGTV quilting board challenge. I'd taken enough pictures along the way that I thought I'd do a simple tutorial to show you how I'd done the process and even some of the trouble I ran into along the way.
I started out with 5”X5” pieces of fabric (several were exchanged with other members of the group swap hosted by KC1930). Trim the nickels down to 3 ½ X 5.
Pick out your complimentary fabric – mine was the tan, and cut lots of 1 ¼ “ strips and attach to each 5” side of your trimmed pieces. Press toward the neutral fabric. Your new-framed piece should be back to the 5” square.
Start laying out your brick pattern in a 4 X 4 grid like the picture and sew up 12 of these blocks. They should measure out to 18” square when you are done. Make 12 of these.
Cut 12 pieces of batting and backing at 20” square, and make your quilt sandwiches. You will now have 12 easily portable pieces to work on when riding along in the car, waiting for appointments, or watching TV. I tried a bunch of different things with mine including machine stitches, big stitch with perle cotton, and even a little outline embroidery.
Putting it all together
Now it’s time to put it all together.
Trim the excess batting away – being careful to NOT cut your backing.
Then trim your backing fabric to 1” larger than your block and batting.
Line up 2 of your large blocks together with backing fabric next to each other. Stitch these 2 blocks together – using your batting as your stitching line.
Press seams open, then fold down ½ of the seam and press it down. Using a decorative stitch, stitch this seam down on both sides.
Continue till you have paired all 12 blocks into 6 pairs.
Pair up each of these pairs with another pair and repeat the joining as you did above.
You should end up with 3 strips that are 4 blocks long.
Here you can see part of 2 of my 3 long strips.
Join your 3 strips in the same manner so you have quilt nearly completed with 3 blocks across and 4 down.
Square up your quilt, bind it - and your DONE
Thursday, November 11, 2010
Finally getting something done!!
I have been in such a drought getting anything done. I can spend time down in the sewing room, but don't seem to accomplish anything! While I know that isn't true - I am making some progress, it just seems like I've been working soooo long on a project that was supposed to go together so quick! More about that later......

I had a June Tailor Binding Buddy, but I didn't want to cut it, and I wanted a template just the size of the pieces I was going to cut, so I duplicated it in the plexiglass. I figured I could get 5 pieces out of the width of fabric if I cut the template at 9 1/2"
In the mean time - I seem to have a lot more impulse to start things than I do finishing them. I was doing some searching for a friendship braid quilt with the little squares that run down the center. I think it's really called a french braid pattern, but I'm no expert - that's for sure.
I got some beautiful batik jelly roll strips that I want to make into a french braid quilt, but I neede to do so practice first.
I did find a link that was just what I was looking for at http://keepyouinstitches.blogspot.com/2010/01/french-braid-tutorial.html and I had several homespun fabrics to try it out with....so that's what I did and here is the results.
I also had in mind something I saw a Missouri Star Quilt Co. tutorial about using a binding tool to make the strips so you didn't have to cut so much off the sides of the sewed piece here's a link to that http://www.youtube.com/watch?v=EpHAp_pyVXQ&feature=channel
.... so off to the shop to get a piece of plexiglass to make a new template.
I had a June Tailor Binding Buddy, but I didn't want to cut it, and I wanted a template just the size of the pieces I was going to cut, so I duplicated it in the plexiglass. I figured I could get 5 pieces out of the width of fabric if I cut the template at 9 1/2"
I had a piece of batting I wanted to use that was 12 X 60". I cut a piece of backing to match, and followed the assembly like the above link showed, only I assemble the pieces right to the batting and backing - Quilt as You Go style. Once I got to the other end of the piece, all I had to do was square it up and bind it! Here is the finished piece.
Tips: Draw a line down the center of your batting and a few 45 degree lines for reference because it's real easy to get off center with the French braids.
Another thing that I did actually get done were these cute little mug rugs. The picture doesn't show them completely done (though a couple of them are done now) because they're going in my take along box to stitch down the binding. This was also an experiment of an idea I had.... these are sandwhiched with:
- Top layer - these are small scraps sewn to the batting with the stich n' flip method.
- Batting -
- Moisture barrier - a piece of clear vinyl cut to fit
- Backing
I put all the layers together and added binding. These ended up about 4X6" which is small for a mug rug, but I love em just the same. The backs are scraps from a Coffee fabric! Perfect place for them, and I also found some fabric that looked like cups to add to the shorter pieces.
Labels:
batik,
french braid,
homespun,
mug mat,
QAYG,
table runner
Wednesday, September 1, 2010
Jewel Box mini quilt
I've been interested in the Jewel Box quilt block, and before I got rid of the scraps I was simply tired of seeing around, I thought I'd just try another mini.
This is what I ended up with.
It's finished at 10 X 14 inches.
While not anywhere near perfect, it was a fun process to try, and I might even be interested enough to make a larger one some day.
This is what I ended up with.
It's finished at 10 X 14 inches.
While not anywhere near perfect, it was a fun process to try, and I might even be interested enough to make a larger one some day.
Another String Quilt
Sometimes when you just don't want to work on a current project and want to do something mindless, you need to have something that is just that. While watching taped shows, or just don't want to concentrate on a specific pattern, String quilts are the way to go.
No matter how I tried - I couldn't get a sharp picture of this quilt. Then I realized too that it was actually upside down because that odd block at the top left was supposed to be on the bottom.
I've just about tapped out all my scraps by the time I finished this quilt.
I still had a few of the strips of fabric found at the Economy Shop from many years back. I also had chunks of an old fabric that was frankly - well, ugly! I cut that fabric up into 11 inch squares, and gathered up a bunch of scrap pieces of batting that I didn't want to throw out. I patched the batting into pieces large enough to use and started in. Here is the result.

I ran out of strips of fabrics and decided that while the results would be plenty long enough - it wasn't wide enough though to not have to pull and tug around to keep cold air from creeping in. It wouldn't take much more so I looked around and found a few more of the scraps and widened it out by about 3 1/2" on one side. Then I took some other small chunks and patched them into a 5" strip on the other side. The finished quilt measures 48 X 70 inches.
It's all machine pieced and Quilt As You Go constructed by using 1 3/4" strips (folded) on the top and 1 1/8" strips on the back then blanked stitch finished.
This went together quick, cleaned out a lot of scraps, and made room for other projects.
No matter how I tried - I couldn't get a sharp picture of this quilt. Then I realized too that it was actually upside down because that odd block at the top left was supposed to be on the bottom. I've just about tapped out all my scraps by the time I finished this quilt.
I still had a few of the strips of fabric found at the Economy Shop from many years back. I also had chunks of an old fabric that was frankly - well, ugly! I cut that fabric up into 11 inch squares, and gathered up a bunch of scrap pieces of batting that I didn't want to throw out. I patched the batting into pieces large enough to use and started in. Here is the result.

I ran out of strips of fabrics and decided that while the results would be plenty long enough - it wasn't wide enough though to not have to pull and tug around to keep cold air from creeping in. It wouldn't take much more so I looked around and found a few more of the scraps and widened it out by about 3 1/2" on one side. Then I took some other small chunks and patched them into a 5" strip on the other side. The finished quilt measures 48 X 70 inches.
It's all machine pieced and Quilt As You Go constructed by using 1 3/4" strips (folded) on the top and 1 1/8" strips on the back then blanked stitch finished.
This went together quick, cleaned out a lot of scraps, and made room for other projects.
Virginia Mountains Quilt DONE
This quilt has been over 2 years in the making. It all started with the fabrics.
Honestly, it took a very long time for me to just cut into the fabric! Since I probably couldn't get more of the material, I wanted to be sure to use what we bought on that trip to Virginia.
Then came the progress shown that is shown here, and here. Then came the quilting. I knew I wanted to hand quilt it in the big stitch method and described some of that process here. What I eventually realized with the right size needle, thimble, rubber finger tip and perle cotton thread, I could finish up the quilting without pliers!
This is how the backing looks - putting leftover pieces, and a large piece of the border fabric from the front.
Here's some close-ups of the quilting. I shadow quilted the triangle pieces of the mountains, and the sky got a free-hand swirly design in a couple of different colors of perle cotton.
I wanted to try a baptist fan design on the border, and just did a simple zig-zag on the inner border.
It's all done.
Generously sized at 60 X 74 inches. And as is necessary for all our quilts here - it is pet tested and approved !!
Doesn't Zeplin look happy!
Honestly, it took a very long time for me to just cut into the fabric! Since I probably couldn't get more of the material, I wanted to be sure to use what we bought on that trip to Virginia.
Then came the progress shown that is shown here, and here. Then came the quilting. I knew I wanted to hand quilt it in the big stitch method and described some of that process here. What I eventually realized with the right size needle, thimble, rubber finger tip and perle cotton thread, I could finish up the quilting without pliers!
This is how the backing looks - putting leftover pieces, and a large piece of the border fabric from the front.
Here's some close-ups of the quilting. I shadow quilted the triangle pieces of the mountains, and the sky got a free-hand swirly design in a couple of different colors of perle cotton.
I wanted to try a baptist fan design on the border, and just did a simple zig-zag on the inner border.
It's all done.
Generously sized at 60 X 74 inches. And as is necessary for all our quilts here - it is pet tested and approved !!
Doesn't Zeplin look happy!
Morning Star Flimsy - done
I've finally gotten my Morning Star quilt top done. I thought I had enough of the border to go all the way around, but had to piece the bottom row. I started off like this...
......but immediately realized that it just didn't look right, so I pulled off that bottom row and added some more of the black instead and this is the result.
I still wish I had more of that red and black print, but I didn't and this seemed to work OK.
You can see a bit more of the progress of this quilt here: and here:
For now I'm considering it nearly done, and can move on to the next thing I need to finish up.
Thursday, July 29, 2010
Alyssa's I spy delivered
I've also been able to finish up the top of my Morning Star Quilt. I ended up making it smaller than I had planned, but I'm still too impatient to get tops done, and have decided throw size is a fine size to finish.
Wednesday, May 26, 2010
Mini quilt updated
oh yeah....I like this much better. I took the batik off the border, added a tiny word border, then a floral.
It's bound with commercial binding and finishes out at 9 X 11 1/2 inches.
This is the second mini I've completed with the tiny bonus triangles from the Morning Star Quilt I've been working on.
Note: This found a new home with my sister who lives in Manhattan, KS who stopped in for a visit and admired it. I know she will find a special place for it in her new home and that it will be well loved.
It's bound with commercial binding and finishes out at 9 X 11 1/2 inches.
This is the second mini I've completed with the tiny bonus triangles from the Morning Star Quilt I've been working on.
Note: This found a new home with my sister who lives in Manhattan, KS who stopped in for a visit and admired it. I know she will find a special place for it in her new home and that it will be well loved.
Sunday, April 25, 2010
Mini pinwheels
Here is another mini I'm working on. It should finish out about 9.5 X 12.
After posting this and seeing the picture I'm going to take that outer border off and replace it with something else. Not sure what, but I don't like what I'm seeing in this picture. While the colors aren't true, I don't care for the batik for that border. Stay tuned - we'll see what I can come up with.
Subscribe to:
Posts (Atom)