Showing posts with label QAYG. Show all posts

Sunday, February 13, 2011

Men's Shirts

Just got this one out of the dryer and ready to go to it's new home. After seeing the You Tube 10 minute block and working out some of the details with the gals at the HGTV quilting board, I dove into the shirts that were waiting for destruction. 100 % cotton shirts that weren't going to be worn again. 

The local economy shop was visited too because I didn't like the way some of the shirts I had played together.

These started out with 8 1/2" squares - 5 of them for each block.  I saved the light shirt for the 'windows'. Each block was layered and quilted them up using my custom templates....That would be a cake-taker lid and a pie plate!!  Just the right sizes and easy to place on the blocks.
Out of 6 shirts I got this whole front with most of the backs still whole - for another project.  I used flannel for the backing on this one to make it extra cozy.

Can you see some of the shirt labels on the outside border?  I was delighted to see that the top part of most of the shirts were large enough to use for the border - and why not just leave the labels on!!  I also left the placket on the sleeves and just stitched them down....tiny button and all.   Then I grabbed some of the extra buttons found on some of the shirts, and sewed them to the center of the windows.

After cutting the squares that I needed from the shirts, I cut the rest (except the backs) into 2 inch strips that I used for the top and bottom border.

I started this quilt around January 22 and finished it tonight - so that's about 3 weeks total time to finish it.  It ended up right at 55" X 75" which is what I always shoot for in this type of quilt.

All those cuffs, collars and button plackets were staring at me while this quilt was in progress.  I knew I would have to do something with them.
This is at least a partial solution:
That's a pillow case to go with the quilt!!  I used one of the shirt backs that I was saving for the back so when you want to sleep on it - you wouldn't have to lay your head on all those buttons!!     

I'm thinking about those cuffs going around some drinking cups for insulation or just catching condensation..... someone shared this link with me:  shirt-cuff-wallet
now - what do I do with shirt collars!


Monday, November 29, 2010

Scrappy Woven Bricks Quilt

Scrappy Woven Bricks Quilt
inspired by: This blogger's post
Finished Size 55” X 74”
192 Nickels
1 yard neutral [or framing fabric]
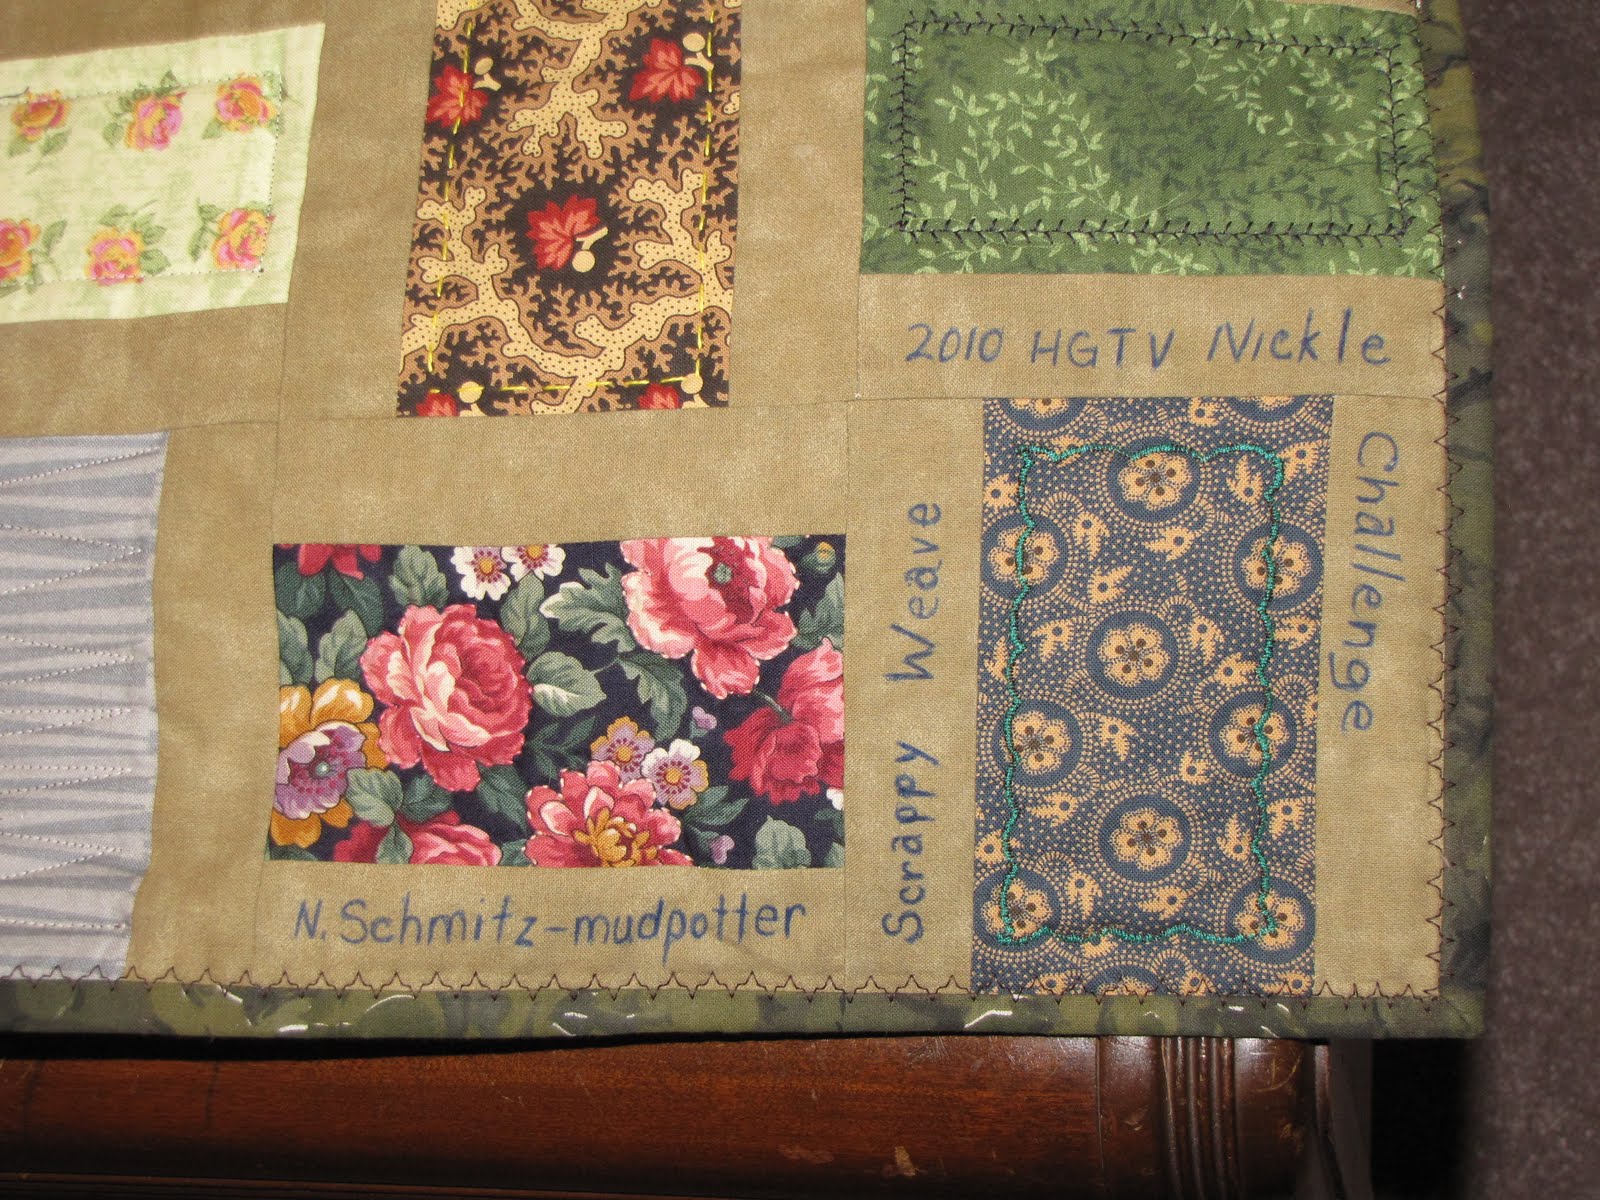
I did it - I finally finished this quilt which is the result of an HGTV quilting board challenge. I'd taken enough pictures along the way that I thought I'd do a simple tutorial to show you how I'd done the process and even some of the trouble I ran into along the way.

I started out with 5”X5” pieces of fabric (several were exchanged with other members of the group swap hosted by KC1930). Trim the nickels down to 3 ½ X 5.

Pick out your complimentary fabric – mine was the tan, and cut lots of 1 ¼ “ strips and attach to each 5” side of your trimmed pieces. Press toward the neutral fabric. Your new-framed piece should be back to the 5” square.

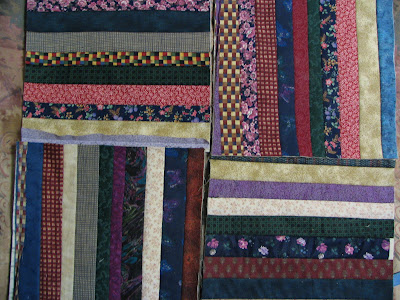
Start laying out your brick pattern in a 4 X 4 grid like the picture and sew up 12 of these blocks. They should measure out to 18” square when you are done. Make 12 of these.

Cut 12 pieces of batting and backing at 20” square, and make your quilt sandwiches. You will now have 12 easily portable pieces to work on when riding along in the car, waiting for appointments, or watching TV. I tried a bunch of different things with mine including machine stitches, big stitch with perle cotton, and even a little outline embroidery.

Putting it all together
Now it’s time to put it all together.

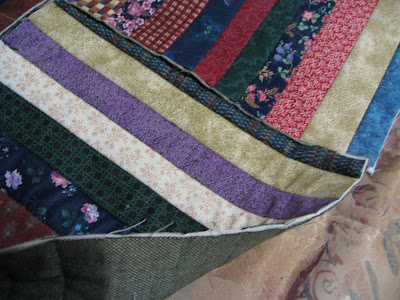
Start by folding and pinning back the backing fabric so you don’t cut into it.


Trim the excess batting away – being careful to NOT cut your backing.


Then trim your backing fabric to 1” larger than your block and batting.


Line up 2 of your large blocks together with backing fabric next to each other. Stitch these 2 blocks together – using your batting as your stitching line.


Press seams open, then fold down ½ of the seam and press it down. Using a decorative stitch, stitch this seam down on both sides.


Continue till you have paired all 12 blocks into 6 pairs.

Pair up each of these pairs with another pair and repeat the joining as you did above.


You should end up with 3 strips that are 4 blocks long.


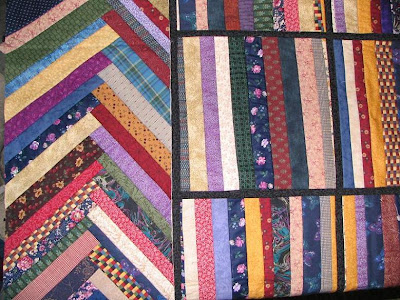
Here you can see part of 2 of my 3 long strips.


Join your 3 strips in the same manner so you have quilt nearly completed with 3 blocks across and 4 down.


Square up your quilt, bind it - and your DONE


Posted by Picasa

Thursday, November 11, 2010

Finally getting something done!!

I have been in such a drought getting anything done.  I can spend time down in the sewing room, but don't seem to accomplish anything!  While I know that isn't true - I am making some progress, it just seems like I've been working soooo long on a project that was supposed to go together so quick!   More about that later......

In the mean time - I seem to have a lot more impulse to start things than I do finishing them.  I was doing some searching for a friendship braid quilt with the little squares that run down the center.  I think it's really called a french braid pattern, but I'm no expert - that's for sure. 
 I got some beautiful batik jelly roll strips that I want to make into a french braid quilt, but I neede to do so practice first.

I did find a link that was just what I was looking for at http://keepyouinstitches.blogspot.com/2010/01/french-braid-tutorial.html and I had several homespun fabrics to try it out with....so that's what I did and here is the results.

I also had in mind something I saw a Missouri Star Quilt Co. tutorial about using a binding tool to make the strips so you didn't have to cut so much off the sides of the sewed piece here's a link to that  http://www.youtube.com/watch?v=EpHAp_pyVXQ&feature=channel
.... so off to the shop to get a piece of plexiglass to make a new template.

I had a June Tailor Binding Buddy, but I didn't want to cut it, and I wanted a template just the size of the pieces I was going to cut, so I duplicated it in the plexiglass.  I figured I could get 5 pieces out of the width of fabric if I cut the template at 9 1/2"

I had a piece of batting I wanted to use that was 12 X 60".  I cut a piece of  backing to match, and followed the assembly like the above link showed, only I assemble the pieces right to the batting and backing - Quilt as You Go style.  Once I got to the other end of the piece, all I had to do was square it up and bind it!    Here is the finished piece. 
Tips:  Draw a line down the center of your batting and a few 45 degree lines for reference because it's real easy to get off center with the French braids.
Another thing that I did actually get done were these cute little mug rugs.   The picture doesn't show them completely done (though a couple of them are done now) because they're going in my take along box to stitch down the binding.     This was also an experiment of an idea I had.... these are sandwhiched with: 
  • Top layer - these are small scraps sewn to the batting with the stich n' flip method.
  • Batting -
  • Moisture barrier - a piece of clear vinyl cut to fit
  • Backing
 I put all the layers together and added binding.  These ended up about 4X6" which is small for a mug rug, but I love em just the same.  The backs are scraps from a Coffee fabric!  Perfect place for them, and I also found some fabric that looked like cups to add to the shorter pieces.
   

Wednesday, September 1, 2010

Another String Quilt

  Sometimes when you just don't want to work on a current project and want to do something mindless, you need to have something that is just that.  While watching taped shows, or just don't want to concentrate on a specific pattern, String quilts are the way to go.
    No matter how I tried - I couldn't get a sharp picture of this quilt.  Then I realized too that it was actually upside down because that odd block at the top left was supposed to be on the bottom.   

   I've just about tapped out all my scraps by the time I finished this quilt.
I still had a few of the strips of fabric found at the Economy Shop from many years back.  I also had chunks of an old fabric that was frankly - well, ugly!  I cut that fabric up into 11 inch squares, and gathered up a bunch of scrap pieces of batting that I didn't want to throw out.   I patched the batting into pieces large enough to use and started in.   Here is the result.


   I ran out of strips of fabrics and decided that while the results would be plenty long enough - it wasn't wide enough though to not have to pull and tug around to keep cold air from creeping in.  It wouldn't take much more so I looked around and found a few more of the scraps and widened it out by about 3 1/2" on one side.  Then I took some other small chunks and patched them into a 5" strip on the other side.  The finished quilt measures 48 X 70 inches.
     It's all machine pieced and Quilt As You Go constructed by using 1 3/4" strips (folded) on the top and 1 1/8" strips on the back then blanked stitch finished.
   This went together quick, cleaned out a lot of scraps, and made room for other projects.

Sunday, December 20, 2009

Christmas Table Topper

I saw a show from Quilt in a day for a small wall hanging. Later as I was looking through some of my Christmas fabrics I found some Santa fabric that just called to me to be fussy cut. This is the result.

Most of it is machine quilted in the Quilt as you go style with gold metalic stitches through the 4-patches and criss-crossed in the middle square.

There are 9 pieces that were layered and quilted, then all were put together with the green sashing/joining strips. It was super easy to do. The 4 patches were made first - with the decorative stitches along the seam lines creating the quilting.

The Santa squares were centered on top of the batting and backing and the white frame was added via the stitch and flip method, then the corner triangles were added. I lost a tiny bit of the points on the frames, so next time I will make the frames a bit smaller to prevent this.

I think it needs a bit more quilting to help it lay good and flat so I will probably add some hand quilting too - but later. I'm thinking some hand quilting on the white frames around each Santa, and maybe even some squares inside each of the 4-patches.
Posted by Picasa

Saturday, January 3, 2009

Grandpa's Shirts


I got on the blog bandwagon thinking I was going to keep current on my projects, particularly my new love quilting. Well shortly after my last post I started a secret project and that's literally all I've done since just about! During that time I also lost use of my camera - it just died. So while I can't show the progress of the secret project, I can show you the results.

This is one of 3 quilts I did for my children. The star and border fabric all comes from 12 different knit shirts my beloved Father in law used to wear. For the past several years since his passing- they have been sitting in a closet waiting for someone to make use of them. Last summer I decided I could use them, but in a different way.


The process was much longer than I'd origionally thought. I figured I'd cut up the shirts, sew them back together and be done! I had a goal of the end of October. Starting in June - that should have been do-able right? wrong!


I did start with cutting up the shirts, and using a fusible interfacing on the back of each piece that I cut apart. I went through yards and yards of interfacing. I set up a 6 foot long table with a wool blanket so I could fuse the pieces of a whole shirt at one time. Still it seemed like this first step was going to take a while.


The next step was to cut the largest square possible out of both the fronts and the backs of the shirts. I found the smallest piece, and the distance between the hem and placket on the front was 15 inches. I then cut this 15" square out of each front and back - 24 total. The rest of the fabric was cut into either 5" or 2 1/2" strips and set aside.


I drew an oversize star on a piece of butcherwrap and taped this to my cutting board. I then stacked about 3 of the squares at a time on top of that star, marking where the corners were and started cutting the lines. Then I had to put everything back together. Since I didn't want bulky seams, I cut another piece of fusible interfacing, reassembled each star on the new interfacing and put them back together - each one being different. After fusing the 2nd backing I secured each seam with a wobbly serpentine type stitch that connected both sides of the seam. I then took a piece of batting and my backing fabric and made a sandwhich. I figured out a pattern of straight stitching and 'quilted' each square with a walking foot on my machine. With some sashing to connect the stars and more puzzle piecing - trying to get the remaining shirt fabric to go as far as possible, I came up with the finished project.
There are actually 2 versions....the one above uses more of the shirting fabric and less of the red accent fabric. I was afraid I'd run out of the shirting, so I used more of the red. I like them both, and ended up having plenty of the shirting, so I guess the furbabies might get their own pillow yet! This last picture probably shows the coloring the best. Daughter has a better camera! All in all it was a wonderful experience, learning new things, problem solving, and just remembering a wonderful Father in law as I created these projects. An added bonus to all this is that I was using the sewing machine that had once belonged to my equally wonderful Mother in law (who has also passed) in making these creations. I couldn't have done it without them and I do miss them.


Tuesday, July 1, 2008

String Quilting

Back in January - shortly after I got that first baby quilt done, I looked at a whole sack of narrow strips of fabric I had been hang onto and decided to try another technique - String Quilting.
I started by shopping in my own stash and came up with some backing and all those strips. I really wish I had a picture of those strips in the beginning, because it was quite the mess! For several hours, I untangled, pressed and sorted a mountain of these strips that someone had no use for. I had picked them up at a local resale shop for virtually nothing, but they sat in my basement for several years too. I was finally going to do something with them.


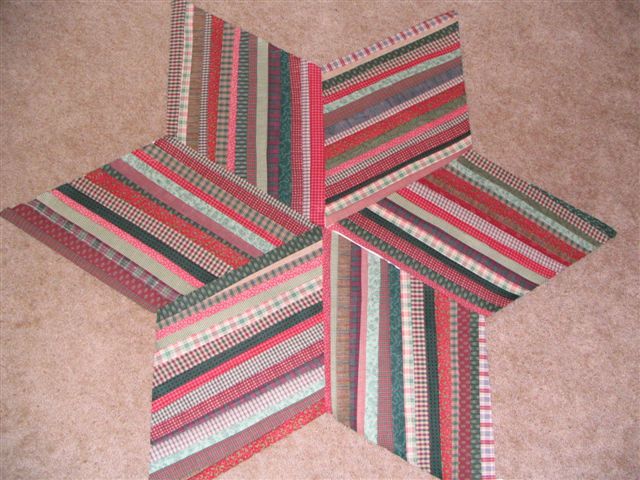
Impatient to get started, I grabbed several large pices of butcher wrap and cut out 60 degree diamond shapes and began sewing, flipping and pressing over and over again. Once I got all the diamonds completed, I trimmed them up and made a tree skirt out of these pieces. Now the coloring on this picture isn't right - the colors are much more vibrant than it shows, but I think you get the idea. I sewed this together - lined it with a large start cut out of a damaged chenille bedspread and now have both a tree skirt or a topper for my round oak table.

Let me tell you now - butcher wrap paper is NOT what you want to use for this technique! I had a heck of a time getting all that paper off once I was done with it. I'm learning as I go and this was a really big learning experience!

I wasn't satisfied with this one. I still had a whole lot more of those strings...and in the little reading I'd done, this was about the only way I was going to use these narrow pieces of fabric up.

I read somewhere that it doesn't matter how small your fabric pieces are - if you can make more fabric from them - they're still worth $7 - $9 a yard - and I still had several yards in that bag.
I started cutting 12 inch squares of the Warm & Natural, the backing material that I still had plenty of and began strip piecing. Because I'd cut several of these, I could chain sew one right after another and only have to get up to press once all 16 of them had a new strip on them. It went fairly fast considering I was sewing and quilting all in one step.

This shows some of the blocks and how I intended to put them together.


The above photo shows the front, back and that Warm & Natural batting in the middle. You can just barely see the quilting lines on the backing. This also presented a problem - I didn't know how to put the blocks together once I had them to this point. I trimmed them all to 11 inches square, stacked them all up in a neat little pile - and there they sat for several months.

Through a message board with HGTV, I absorbed as much as I could from a wonderful group of ladies. My sis (the one that made it possible for that first baby quilt to get done) had told me about this group of gals. They were fabulous! If you have questions about quilting - someone there will know the answers.

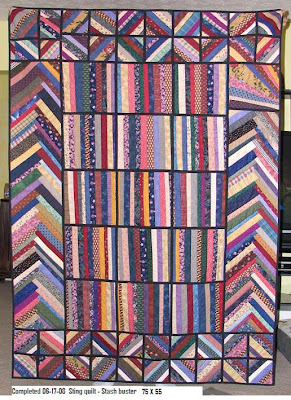
I put all the 11 inch squares together. Look at the above picture. I only used 15 of the blocks and set them 3 across and 5 down, using a small piece of black fabric to connect them. That only made this throw 33 X 55 and I knew it had to be much larger than that to be used. I'd been reading about a Braid technique - again using those scraps and quilting as I went, I made a long piece of 'braid to put next to those blocks. I didn't like making the braid as well as the blocks because you couldn't chain piece them. Each small piece of material had to be a seperate step.

With the help and advice of those HGTV quilters, this is the final results. I absolutely love it - especially when you consider all but that little bit of black had been sitting in my sewing cabinet for years waiting to have something done with it. It's now complete 55X75 . I have to ask myself - Is there things I would change? - Yes But it's done and being used, and I'm tickled to have something for almost nothing. If I hadn't done something soon with that pile of fabric in that sewing cabinet - it was going to get tossed. A very win / win situation.